Hello ImGui and ImmApp are the two main ways to create applications with ImGui Bundle.
Hello ImGui is a cross-platform framework that handles window creation, backend initialization, assets, theming, and more.
ImmApp (Immediate App) is a thin wrapper around Hello ImGui that simplifies the initialization of add-ons (ImPlot, Markdown, Node Editor, etc.).
These runners enable you to create powerful ImGui applications with minimal boilerplate code.
Hello ImGui
Quick Start
from imgui_bundle import hello_imgui, imgui

def gui():
    imgui.text("Hello, world!")

hello_imgui.run(gui, window_title="My App", window_size=(800, 600))
#include "hello_imgui/hello_imgui.h"
#include "imgui.h"
void gui() {
ImGui::Text("Hello, world!");
}
int main() {
HelloImGui::Run(gui, "My App", {800, 600});
return 0;
}Documentation
Hello ImGui Documentation - Full documentation
RunnerParams Reference - All configuration options
API Reference - Full API documentation
Configuration with RunnerParams
For full control, configure your application via RunnerParams:
from imgui_bundle import hello_imgui, imgui

def gui():
    imgui.text("Hello!")

# Create and configure runner params
params = hello_imgui.RunnerParams()
params.app_window_params.window_title = "My Application"
params.app_window_params.window_geometry.size = (1200, 800)
params.app_window_params.restore_previous_geometry = True

# ImGui window settings
params.imgui_window_params.show_menu_bar = True
params.imgui_window_params.show_status_bar = True

# Set the GUI callback
params.callbacks.show_gui = gui

# Run
hello_imgui.run(params)
#include "hello_imgui/hello_imgui.h"
#include "imgui.h"
void gui() {
ImGui::Text("Hello!");
}
int main() {
HelloImGui::RunnerParams params;
params.appWindowParams.windowTitle = "My Application";
params.appWindowParams.windowGeometry.size = {1200, 800};
params.appWindowParams.restorePreviousGeometry = true;
params.imGuiWindowParams.showMenuBar = true;
params.imGuiWindowParams.showStatusBar = true;
params.callbacks.ShowGui = gui;
HelloImGui::Run(params);
return 0;
}See RunnerParams Reference for all configuration options. For Python, see RunnerParams Type Hints
Callbacks
Hello ImGui provides several callback hooks:
| Callback | When Called |
|---|---|
show_gui | Every frame (main GUI) |
show_menus | Every frame (menu bar content) |
show_status | Every frame (status bar) |
post_init | Once, after OpenGL initialization |
before_exit | Once, before shutdown |
See Full Callback Reference for details. For Python, see Callbacks Type Hints.
Application Settings
ImGui applications store settings (window positions, etc.) in an INI file. By default, it’s named after your window title. For production apps, use a proper config location:
params.ini_folder_type = hello_imgui.IniFolderType.app_user_config_folder  # ~/.config or AppData
params.ini_filename = "my_app/settings.ini"
You can also store custom settings: hello_imgui.save_user_pref("key", "value") / load_user_pref("key")
DPI-Aware Sizing
Never use fixed pixel sizes. This leads to portability issues on high-DPI screens.
Instead, use sizes relative to the font size using “em” units. Hello ImGui provides helper functions:
from imgui_bundle import imgui, em_to_vec2, em_size

def gui():
    # Button sized as 10em x 2em (scales with DPI)
    imgui.button("A button", em_to_vec2(10, 2))

    # For single values, use em_size
    width = em_size(10)
#include "imgui.h"
#include "hello_imgui/hello_imgui.h"
void gui() {
// Button sized as 10em x 2em (scales with DPI)
ImGui::Button("A button", HelloImGui::EmToVec2(10, 2));
// For single values, use EmSize
float width = HelloImGui::EmSize(10);
}ImmApp
ImmApp handles add-on initialization automatically via simple boolean flags.
Quick Start
from imgui_bundle import immapp, imgui, implot, imgui_md

def gui():
    imgui_md.render("# Hello with Markdown!")

    if implot.begin_plot("My Plot"):
        implot.plot_line("data", [1, 2, 3, 4], [1, 4, 2, 3])
        implot.end_plot()

# Enable add-ons with simple flags
immapp.run(
    gui,
    window_title="My App",
    window_size=(800, 600),
    with_implot=True,
    with_markdown=True
)
#include "immapp/immapp.h"
#include "imgui_md_wrapper/imgui_md_wrapper.h"
#include "implot/implot.h"
void gui() {
ImGuiMd::Render("# Hello with Markdown!");
if (ImPlot::BeginPlot("My Plot")) {
double x[] = {1, 2, 3, 4};
double y[] = {1, 4, 2, 3};
ImPlot::PlotLine("data", x, y, 4);
ImPlot::EndPlot();
}
}
int main() {
HelloImGui::SimpleRunnerParams runnerParams;
runnerParams.guiFunction = gui;
runnerParams.windowSize = {800, 600};
ImmApp::AddOnsParams addons;
addons.withImplot = true;
addons.withMarkdown = true;
ImmApp::Run(runnerParams, addons);
return 0;
}Available Add-ons
| Flag | Add-on | Description |
|---|---|---|
with_implot | ImPlot | 2D plotting |
with_implot3d | ImPlot3D | 3D plotting |
with_markdown | imgui_md | Markdown rendering |
with_node_editor | imgui-node-editor | Node graphs |
with_tex_inspect | imgui_tex_inspect | Texture inspector |
Full Configuration
For advanced configuration, use RunnerParams (same as Hello ImGui) combined with AddOnsParams:
immapp.run(runner_params, addons)  # Python
ImmApp::Run(runnerParams, addons);  // C++
Usage examples and demonstrations
Below are demonstrations from the ImGui Bundle Interactive Manual, showcasing various features of Hello ImGui and ImmApp.
Docking Demo
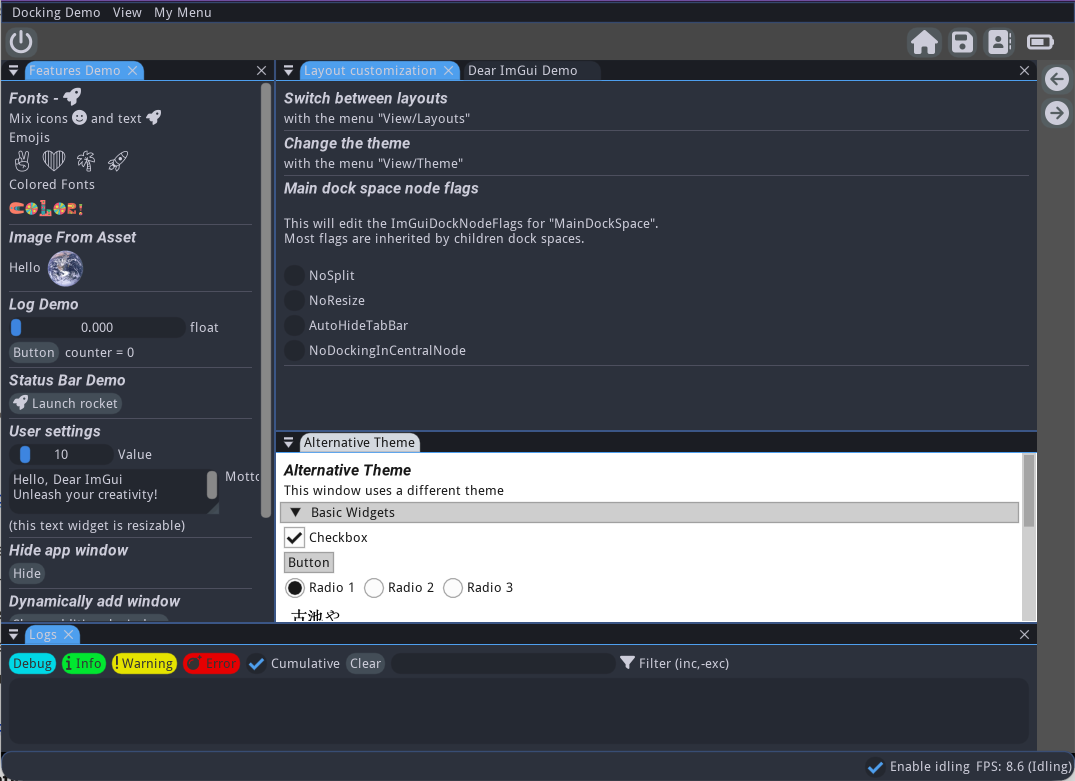
Docking Demo - Full-featured ImGui application with Hello ImGui
Docking Demo shows how to create a full-featured application:
Complex app layout (with several possible layouts)
Load additional fonts, possibly colored, and with emojis
Display a status bar and log window
Customize the theme
User settings persistence
The source code is heavily documented and can be used as a template for your own applications.
ImmApp - Launch an app with addons
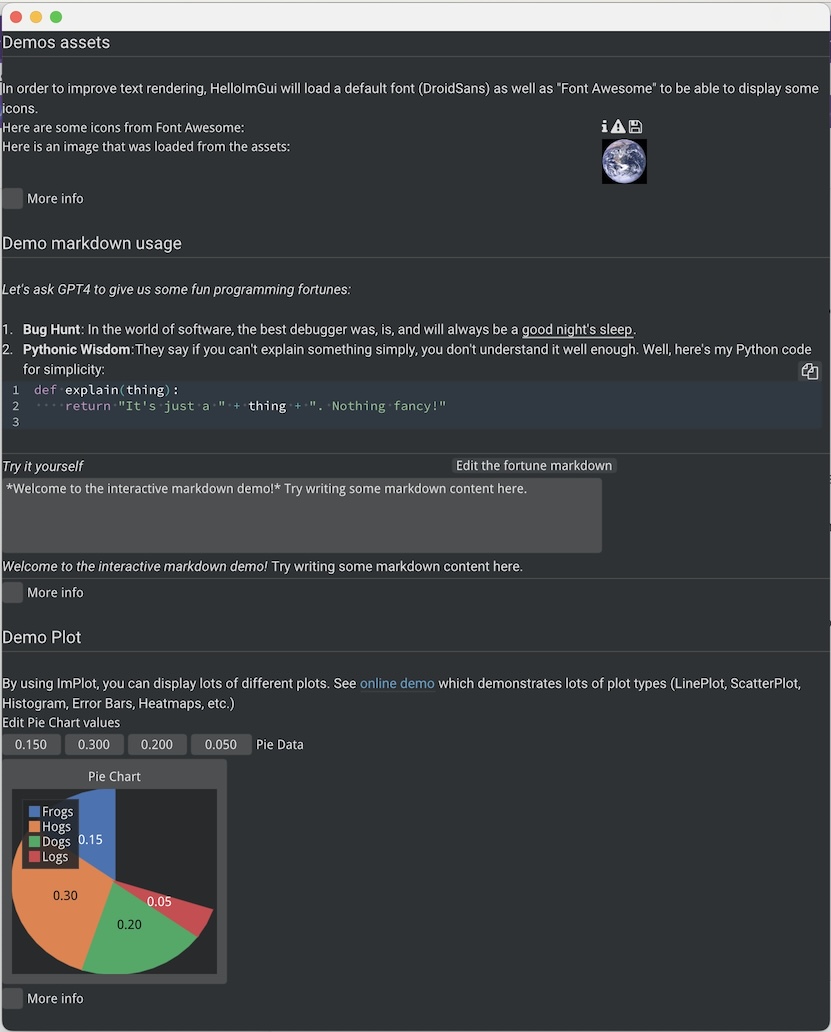
ImmApp with add-ons: assets, markdown, and ImPlot
Demonstrates how to use ImmApp with multiple add-ons:
Load and display assets (images, icons)
Render markdown content with imgui_md
Display interactive plots with ImPlot
Custom 3D Background
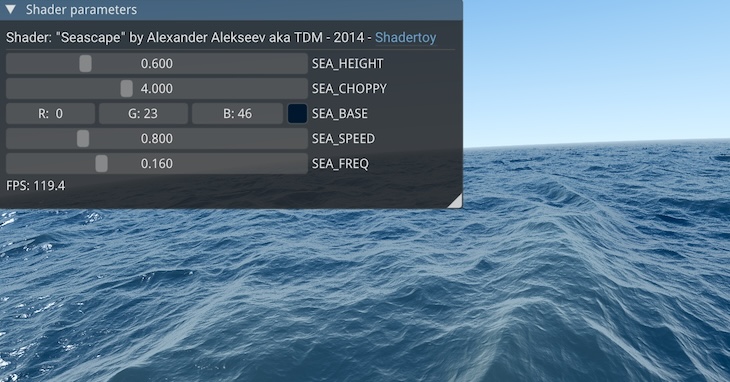
Custom 3D background with OpenGL shaders
Demonstrates how to render a custom 3D background using OpenGL:
Use
runner_params.callbacks.custom_backgroundcallbackLoad and compile shaders
Adjust uniforms via the GUI
Power Save Mode
Demonstrates FPS idling to reduce CPU usage when the app is idle.
Hello ImGui automatically reduces FPS when no user interaction is detected. Configure this with:
immapp.run(gui, fps_idle=10.0)  # 10 FPS when idle

# Or dynamically:
runner_params = hello_imgui.get_runner_params()
runner_params.fps_idling.fps_idle = 10.0
runner_params.fps_idling.enable_idling = True
Demo: Try online |
Advanced - Manual Rendering
For complete control over the render loop (useful for game engines or custom frameworks), use manual rendering instead of run().
from imgui_bundle import imgui, hello_imgui, immapp

def gui():
    imgui.text("Hello, ImGui Bundle!")

# Setup
runner_params = hello_imgui.RunnerParams()
runner_params.callbacks.show_gui = gui
addons = immapp.AddOnsParams()
addons.with_implot = True
immapp.manual_render.setup_from_runner_params(runner_params, addons)

# Custom render loop
while not hello_imgui.get_runner_params().app_shall_exit:
    immapp.manual_render.render()
    # Do other work here (physics, networking, etc.)

# Cleanup
immapp.manual_render.tear_down()
#include "imgui.h"
#include "hello_imgui/hello_imgui.h"
#include "immapp/immapp.h"
int main()
{
// Setup
HelloImGui::RunnerParams runnerParams;
runnerParams.callbacks.ShowGui = []() {
ImGui::Text("Hello, ImGui Bundle!");
};
ImmApp::AddOnsParams addons;
addons.withImplot = true;
ImmApp::ManualRender::SetupFromRunnerParams(runnerParams, addons);
// Custom render loop
while (!HelloImGui::GetRunnerParams()->appShallExit) {
ImmApp::ManualRender::Render();
// Do other work here (physics, networking, etc.)
}
// Cleanup
ImmApp::ManualRender::TearDown();
return 0;
}Use cases: game engine integration, heavy computation between frames, synchronizing with external systems, precise frame timing control.
Demo: Try online | Python | C++
See Also
Dear ImGui Basics – Widget concepts, IDs, common patterns
ImGui Test Engine – Automated testing for ImGui apps
Add-on Libraries – ImPlot, ImmVision, markdown, node editors